How To Build A WordPress Development Environment
A number of our maintenance clients have asked us to build development environments for them, I thought it would be a good idea to outline how we create development environments, in case you wanted one too.
What Is Development Environment?
A development environment is a clone of your live site that you can work on without impacting your live site. You could use your development site for any of the following reasons:
- Installing and testing new themes without changing live.
- Adding new plugins and testing if they work with your live site.
- Coding up changes to themes or plugins, such as CSS tweaks.
- Load testing your site with thousands of users
The point is, it’s a clone of your live site you can play with and not harm your live site. This is a tried and tested principle of software development, you develop and test in the development environment, then promote to live once you are happy.
The Process.
I’m going to teach you how to build a development environment in the following format.
Your live site is at yourdomain.com. We are going to build a completely separate site at yourdomain.com/development.
Step 1: Create A New Database
We are going to build a new database for development so any impact on the database does not affect your live site.
To create a new database login to you hosting account and look for the control panel. Under there will be a number of database tools. I cannot give you exact details as each hosting company does things slightly differently. If you host uses cPanel, which the majority do, the tools will look like this.
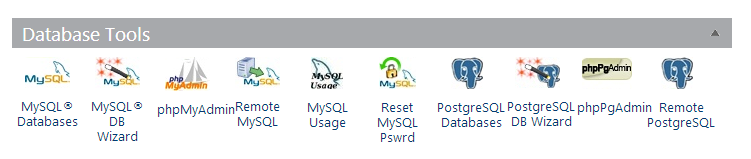
Run the MYSQL DB Wizard, this will step you through creating a new database. Remember to note the database name, user name and password you will need them later in the process.
Step 2: Clone Your Live Site
The next step is to clone your live site, I like to use a plugin called duplicator to do this.
https://wordpress.org/plugins/duplicator/
Install the plugin and create a duplicator package, this is an archive of all your files and your database. Here is a quick video to show you how to create an archive with duplicator.
[youtube http://youtu.be/eiiKFhDfGZw]Step 3: Build The Development Area
Connect to your site using ftp and create a subdirectory called development.
Upload the installer.php file you just created along with the archive files you have downloaded to the subdirectory /development.
In a web browser open the file yourdomain.com/development/installer.php. This will run a script to duplicate your site to /development.
The first thing the script asks for are the database details you created in step one .
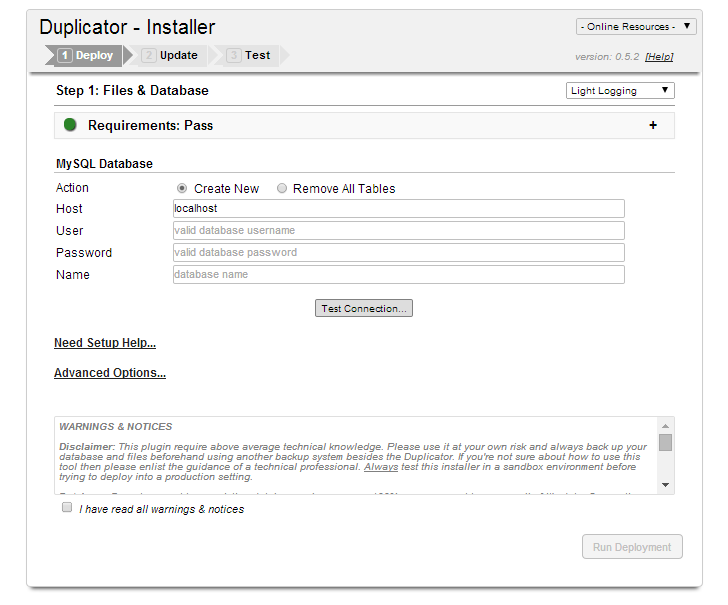
Once you can connect to the database click run deployment and the script runs duplicating your site.
What is so cool about duplicator is it changes all the URLs in your site so if anything was pointing to yourdomain.com/image.png it would be changes to yorudomain.com/development/image.png. In the past I used to write database scripts to do all this for me.
That’s it, your site is cloned.
Mark It As Private
The last thing to do is mark your new development site as private. You have cloned all your post and pages so you don’t want Google slapping you with a duplicate content penalty do you?
On the new development site go to settings -> reading search engine visibility and click on “Discourage search engines from indexing this site”

Test To Your Hearts Content
You now have a clone of your live site that you can mess around with to your hearts content. Sometimes these sites are called sandboxes after the kids play area where you can mess around, build castles, poor water everywhere and not worry about your live site.
Wrap Up
Want you own development site but are not confident to do it? Why not join our maintenance program and we can build one for you.
Photo Credit: ansik via Compfight cc